

TM1: Verify Ticketmaster Pixel Tracking in 10 Minutes for Cultural Orgs


Yes, you can track Ticketmaster sales with pixels, and you do it through TM1’s Pixel Manager. Log into TM1, go to Marketing, then Tracking, and select Add Pixel. Paste the vendor’s image-based starting URL, apply it to the confirmation page for purchase events, and confirm it fires before your campaign goes live. If your organization runs a restricted checkout flow or a season-long enterprise campaign, loop in your Ticketmaster marketing representative before launch.
TL;DR:
Properly configured pixels must include transaction-specific parameters like order ID, amount, and currency to deliver useful conversion data.
Verification of pixel fires should occur through browser Network tab testing on both desktop and mobile devices to ensure accuracy.
Using consistent naming conventions and matching event labels across platforms improves attribution and simplifies reconciliation.
Ticketmaster’s restrictions mean only image-based pixels with start URLs are supported, requiring careful setup and testing before campaigns go live.
Outsourcing pixel setup and ongoing reconciliation to specialized agencies can reduce technical errors and improve measurement reliability.
Table of Contents
How Do You Set Up Ticketmaster Pixel Tracking in TM1?
TM1 is the control center for every pixel that touches your event pages, and the setup path is the same whether you’re tracking a single-night engagement or a full season. The interface handles image-based pixels because Ticketmaster doesn’t support JavaScript tags directly on its checkout pages, which is why nearly every vendor guide, from MNTN’s help center to Vibe’s documentation, routes you toward a “Starting URL” field rather than a script snippet.
Here’s the sequence, start to finish:
Log into TM1 and navigate to Marketing, then Tracking, then Pixel.
Select Add New Pixel (some accounts show this as Create New Pixel, but the workflow is identical).
Choose your channel and pick a vendor from the dropdown, or select Custom if your platform isn’t listed.
Check the page types you want the pixel to fire on. This usually means the Event Detail Page (EDP), the Confirmation Page (Primary and Resale sales get separate checkboxes), and sometimes the Artist or Venue page for broader retargeting audiences.
Set your Start and End dates. For testing, use a start date of today and leave the end date open. That keeps the pixel live while you verify it without triggering an early cutoff.
Paste the starting URL your vendor supplied into the Starting URL field. This is the image pixel string, not a JavaScript tag.
Save and document the pixel ID, the page types selected, and the vendor name in a shared tracker so your team isn’t hunting through TM1 later to remember what maps to what.
The official TM1 marketing guidance recommends placing pixels before you activate any paid campaign, not after, so conversions get captured from the first impression rather than starting mid-flight. That single habit prevents the awkward gap where your ad spend starts a week before your measurement does.
Pro Tip: Keep a naming convention for every pixel you create, something like “Meta_Purchase_FallSeason_EDP.” Six months from now, when you’re auditing forty pixels across a full season, you’ll thank yourself.
What Parameters Does a Ticketmaster Pixel Need?
A pixel without the right parameters fires, but it tells you almost nothing useful. Conversion pixels in particular need a specific set of fields to actually connect a click to a sale.
purchase_id or order code: the unique identifier for the transaction, essential for matching pixel data back to box-office records later.
amt (or face value): the dollar amount of the order, required for any pixel measuring revenue rather than just a pageview.
ccy (currency): the currency code, which matters even for domestic-only venues because some ad platforms default to the wrong currency without it.
plh or cb (anti-cache parameter): a random or timestamp value that prevents browsers from caching the pixel request and undercounting fires.
url or ref: the referring page, useful for troubleshooting and for confirming the pixel triggered from the page you intended.
Pageview and lead pixels can usually skip amount and currency since they’re not measuring a transaction, but conversion pixels need the full set. MNTN’s documentation is explicit on this point: skip the anti-cache parameter and you risk deduplication problems, where a single purchase gets logged as multiple fires or, worse, none at all. A pageview pixel belongs on the Event Detail Page; a purchase pixel belongs on the Confirmation Page, and mixing those up is one of the most common setup errors marketers make.
How Do You Verify a Ticketmaster Pixel Is Firing Correctly?
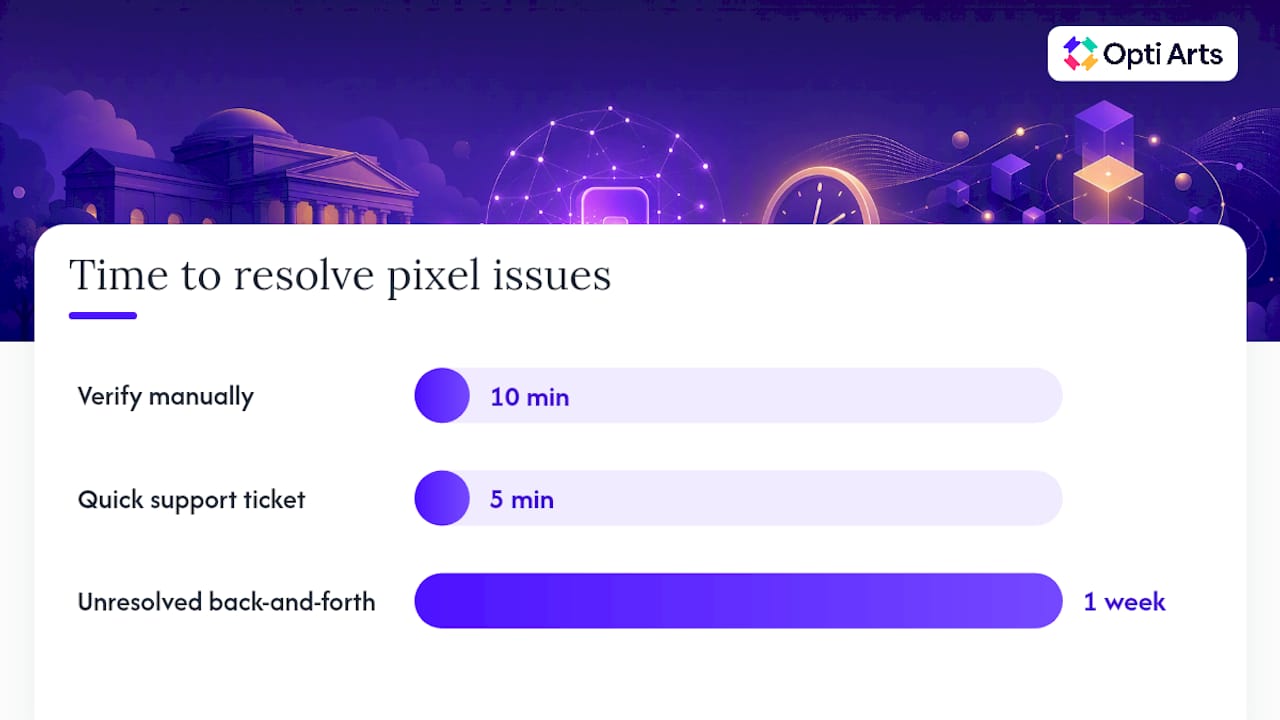
Don’t trust a pixel just because TM1 shows it as active. Verification takes ten minutes and saves you from discovering a broken funnel three weeks into a campaign.
Open your browser’s Network tab (right-click, Inspect, then Network) before loading the confirmation page.
Complete a test purchase or use the confirmation page preview if your event allows it.
Filter for image requests and locate the GET request matching your pixel’s domain.
Check the query string for your order ID, amount, and currency values, confirming they populated correctly rather than showing as blank or literal placeholder text.
Repeat for each page type you selected, since a pixel that fires on the EDP doesn’t guarantee it fires on Confirmation too.
Common failures trace back to a handful of causes: the wrong page type checked in TM1, a misnamed custom parameter that doesn’t match what your vendor expects, browser caching masking a duplicate fire, or a URL-encoding issue that breaks the amount field. Vendor testing guidance consistently points back to the Network tab as the fastest diagnostic. If none of that resolves it, escalate to Ticketmaster support with the exact page URL, a screenshot of the network request, and your pixel ID in hand. That’s the difference between a five-minute support ticket and a week of back-and-forth.
Pro Tip: Run your verification test twice, once as a desktop session and once on mobile. Mobile browsers handle caching differently, and a pixel that fires clean on desktop can silently fail on a phone.
How Should You Measure and Attribute Pixel Data?
Getting the pixel to fire is half the job. Making that data useful for optimization is the other half, and it’s where most setups quietly fall apart.
Match naming conventions across platforms. If your TM1 pixel is labeled “Purchase_EDP” but your Meta conversion event is called “Ticket_Buy,” your attribution reports won’t line up cleanly, and you’ll spend hours reconciling by hand instead of minutes.
Lean on mid-funnel signals when purchase data is thin. Browser privacy restrictions increasingly limit how much final-purchase data reaches ad platforms, so practitioner guidance on running Ticketmaster ads recommends feeding mid-funnel events, like Add to Cart equivalents, alongside offline conversion uploads to keep optimization signal healthy.
Verify domain ownership on platforms like Meta and Google that require it for accurate event attribution across your ticketing subdomain.
Reconcile weekly. Compare TM1 pixel counts against box-office settlement data and your ad platform’s reported conversions. A variance under 5 to 10% is typical due to attribution windows and browser loss; anything wider usually points to a parameter problem.
Measurement step | What it catches |
Naming alignment | Mismatched events across TM1 and ad platforms |
Mid-funnel signal use | Gaps from privacy-limited purchase tracking |
Domain verification | Broken attribution on Meta/Google |
Weekly reconciliation | Pixel counts drifting from actual box-office sales |
What Should Cultural Organizations Prioritize First?
For most performing arts campaigns, confirmation-page revenue data should drive your optimization once you have enough purchase volume to feed the algorithm reliably. Below that threshold, mid-funnel events keep your ad platform learning. Opti Arts uses its Breakeven dashboard to pull TM1 pixel data against box-office settlement and ad-platform numbers in one view, which shortens the reconciliation cycle from days to a single sitting. Before you hand a pixel setup to your analytics team, package a short checklist: the named parameters used, a completed test order, a screenshot of the network request, and the verification date. That handover packet is what keeps a season-long campaign from breaking silently in week six.
What This Guide Gets Right That Most Don’t
Most pixel tutorials treat Ticketmaster like it’s just another checkout page you bolt Meta’s pixel onto. It isn’t. Ticketmaster’s platform restricts JavaScript placement, forces you into image-based pixels, and gates a chunk of the checkout flow behind a system you don’t fully control. That’s not a footnote, it’s the entire reason so many cultural organizations end up with broken attribution and no idea why.
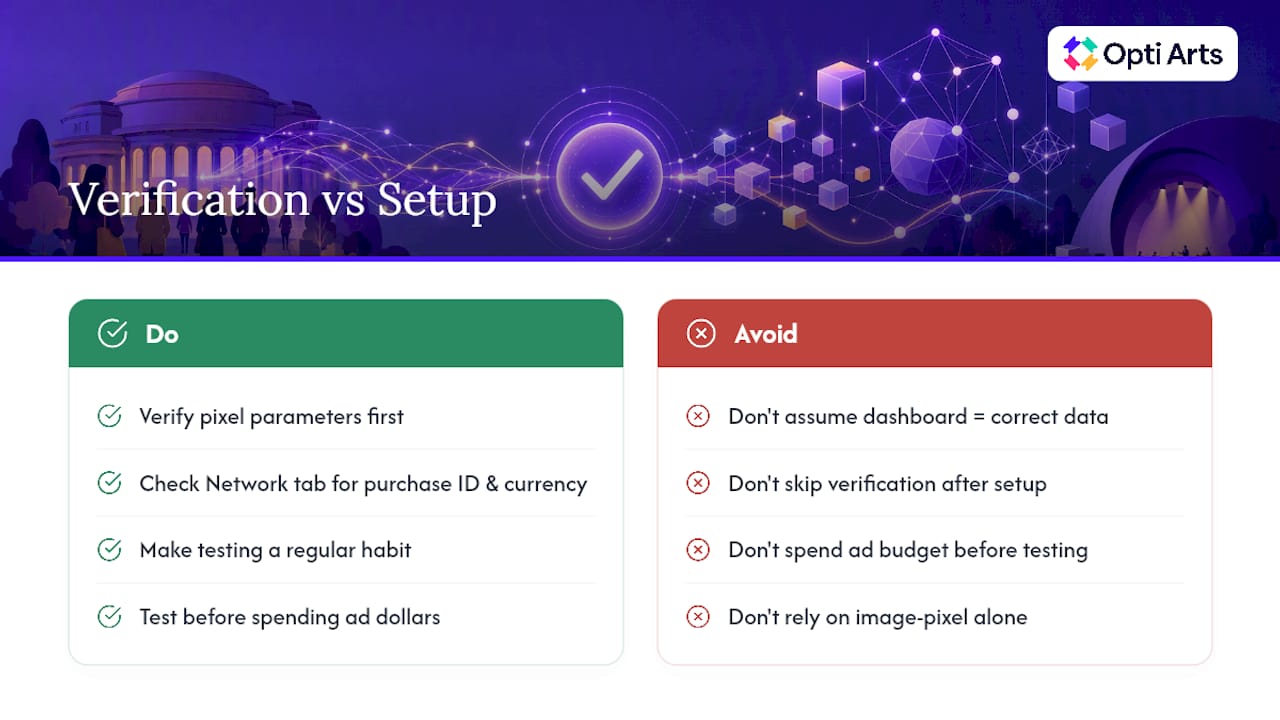
The conventional advice tells you to “install your pixel and start optimizing.” That skips the part that actually matters: verifying the parameters before you trust a single dollar of reported revenue. A pixel that fires without a purchase ID or currency field looks successful in TM1’s dashboard while quietly making your reconciliation impossible.
If you take one thing from this walkthrough, make it the testing habit, not the setup steps. Setup is mechanical. Verification is where campaigns actually get saved or sunk. Do the Network tab check before you spend a single ad dollar against that pixel, not after your first reconciliation report comes back confusing.
— Trevor
Get TM1 Pixel Setup Handled by a Team That Reconciles the Data Too
Some digital marketing agencies build and verify TM1 pixel setups for cultural organizations to help them focus on programming rather than technical troubleshooting. That’s the practical edge here: instead of your team piecing together vendor docs and Network tab checks between other duties, Pixel creation, parameter mapping to platforms like Meta and Google, and reconciliation against box-office settlement can be managed within an integrated workflow by specialized service providers.

This makes the most sense for season-level campaigns, venues running complex or restricted checkout flows, or any organization that needs pixel data to actually connect to attendance numbers rather than sitting in a spreadsheet nobody trusts. Opti Arts’ managed campaign solutions cover the setup and platform integration, while the Breakeven dashboard handles the ongoing reconciliation between pixel counts, ad spend, and actual ticket revenue. If your current setup leaves you guessing whether a campaign worked, request a demo and see what a reconciled view of your pixel data actually looks like.
Where to Check Official Ticketmaster and Vendor Documentation
Ticketmaster’s marketing game plan for official TM1 guidance
MNTN’s pixel installation guide for parameter specifics
Vibe’s pixel tracking instructions for image pixel setup
Patchboard’s step-by-step walkthrough for a practitioner’s view of the TM1 flow
Sources
FAQ
Is Pixel Tracking Illegal?
No, pixel tracking is legal in the United States, though it’s subject to privacy regulations that govern consent and data handling, such as the California Consumer Privacy Act for residents of that state. The legality question usually comes down to disclosure and consent practices on your site, not the pixel technology itself.
What Does “Tracking Pixels Detected” Mean?
This message, often shown by browser privacy tools or email clients, simply means a small tracking image was found loading on a page or in a message. For Ticketmaster campaigns, it typically confirms your TM1 pixel is present and attempting to fire, which is a good sign during testing.
Why Are Tracking Pixels Controversial?
Tracking pixels raise privacy concerns because they can collect data, like IP addresses and browsing behavior, without always making that collection obvious to the person being tracked. That tension is part of why browsers increasingly block or limit third-party pixels, pushing marketers toward mid-funnel signals and offline conversion uploads to preserve measurement accuracy.
How Does Pixel Tracking Work?
A pixel is a tiny, often invisible image request that loads when someone visits a page or completes an action, like a ticket purchase. The request carries parameters, such as an order ID or amount, back to the ad platform or analytics tool, letting it connect that action to the campaign that drove it.
Can Opti Arts Set Up My Ticketmaster Pixels for Me?
Yes, Opti Arts implements TM1 pixel setups, maps events to platforms like Meta and Google, and reconciles the results through its Breakeven dashboard. Pricing details for managed campaign services are available directly through the Opti Arts solutions page.
Recommended